
Build Desktop
title: “첫 데스크탑 조립 #1 (Building a Desktop first time #1)” categories:
- Desktop Building tags:
- Desktop Building
last_modified_at: 2020-03-06T14:00:00-16:00
—
준비 (Preparation)
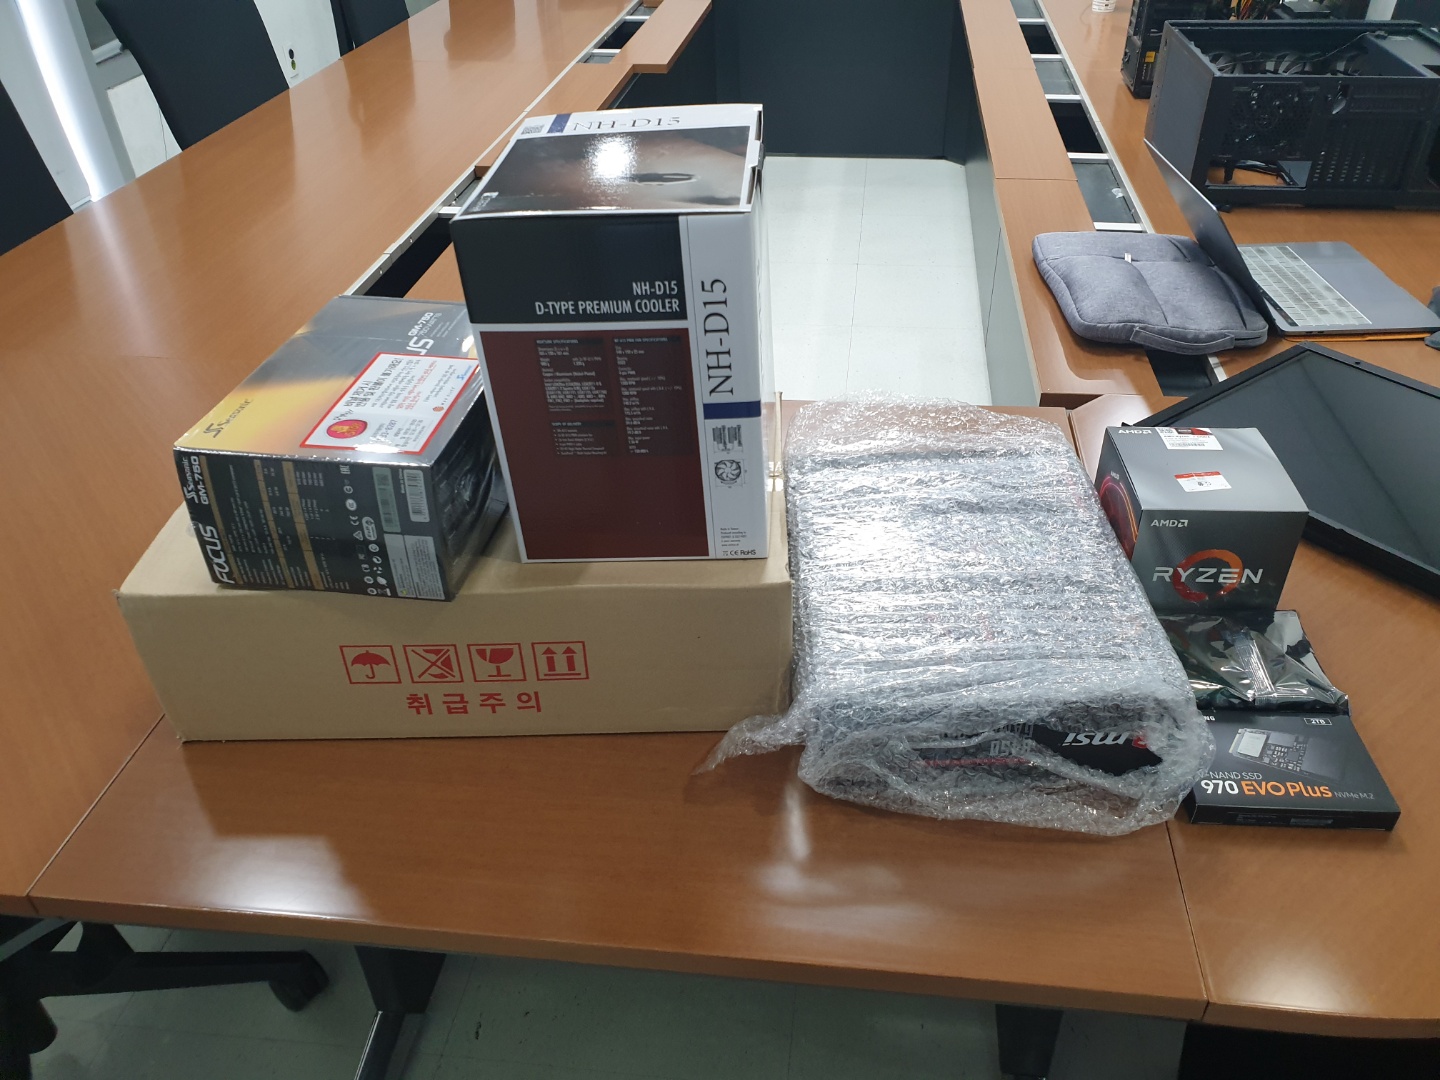
데스크탑 조립에서 가장 첫번째로 필요한 과정은 뭐니뭐니해도 어떤 장비들을 구매할것인지 정하는 과정이다. 이 과정은 사실 데스크탑의 용도와 가장 밀접하게 관련이 된다고 생각하는데, 이번에 제작하는 컴퓨터는 연구실에서 Deep Learning을 위해 제작할 서버용 컴퓨터이기 때문에 굉장히 High-end 스펙으로 장비들을 주문하였다.
The first step of building a new desktop is definitely choosing and buying materials for the new desktop. This process is highly related on the main use of the new desktop. This time I need a desktop for my Deep learning experiment, thus I ordered high-end materials.
| 재료 (Material) | 제품 (Product) | 수량 (Amount) |
|---|---|---|
| CPU | AMD Ryzen 7 3700X | 1 |
| Motherboard | MSI B450 Gaming Pro Carbon AC | 1 |
| SSD | Samsung 970 EVO Plus M.2 2280 SSD 2TB | 1 |
| HDD | Seagate IRONWOLF Pro NAS HDD 8TB | 1 |
| Memory | Samsung DDR4 16GB RAM/PC4-21300 16GB | 4 |
| Power | Seasonic Focus Gold GM-750 Modular Power (ATX/750W) | 1 |
| Graphic card | ASUS ROG STRIX GeForce RTX 2080 Super 8GB | 1 |
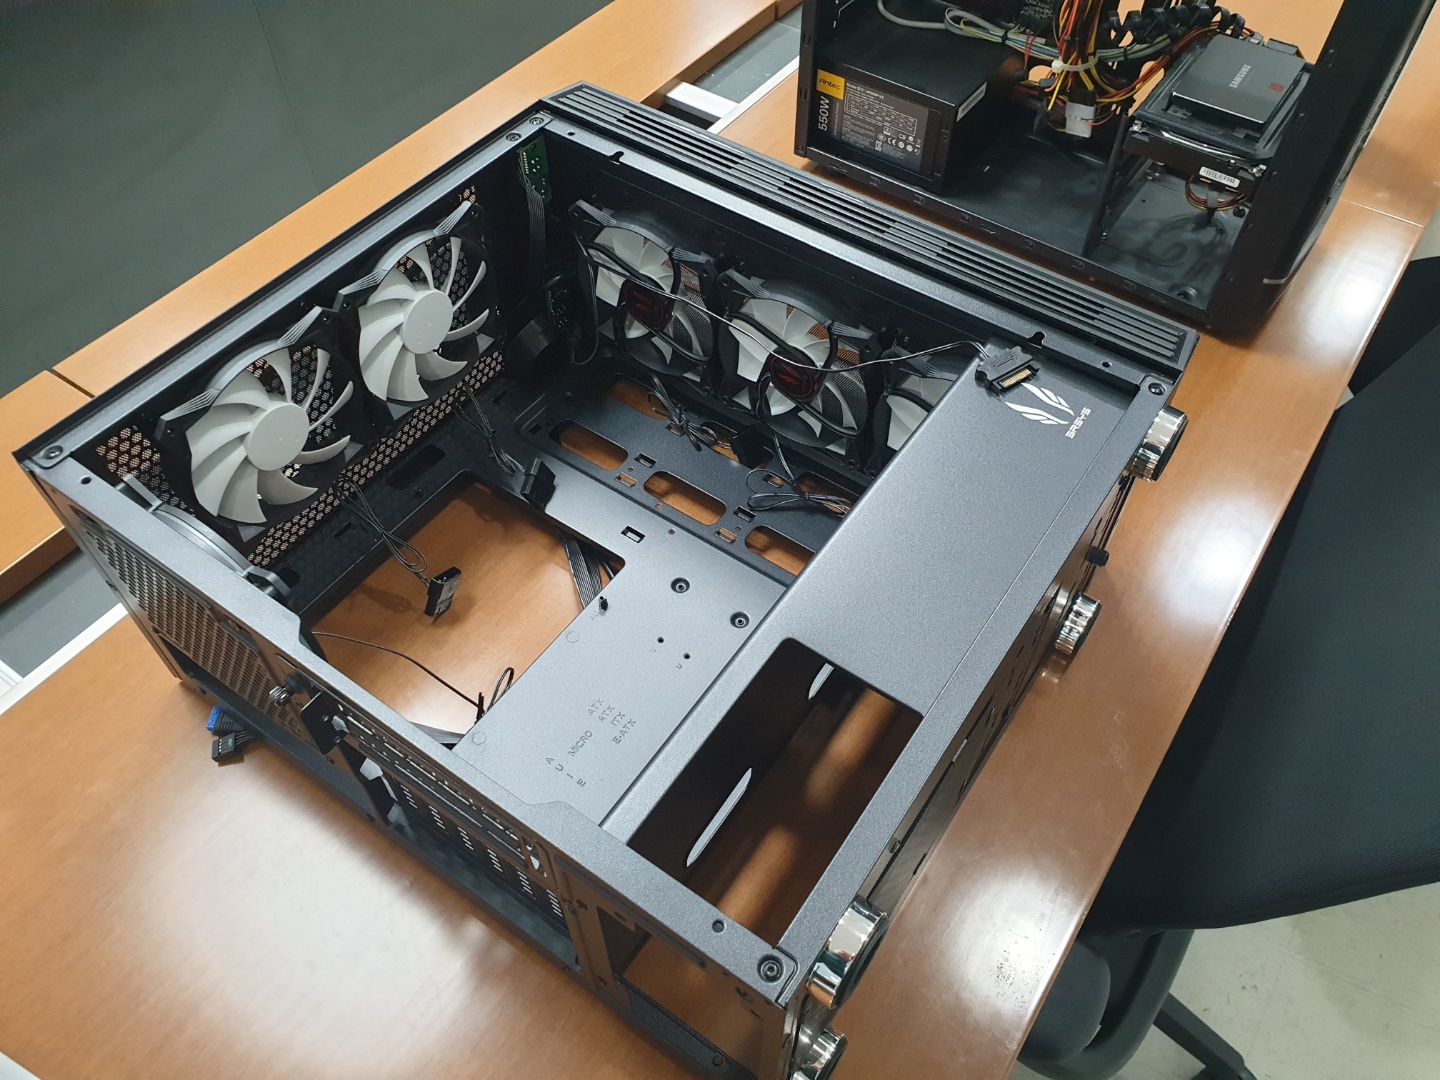
| Case | 3RSYS S700 Espresso CT Black | 1 |
그 외에 셀프 조립을 위해 필요한 준비물로는 장갑, 십자/일자 드라이버, 케이블타이 정도이다. 조립에 사용되는 작은 나사들이나
SATA 케이블과 같은 케이블들도 다 들어있기 때문에 추가적으로 반드시 필요한게 아니면 장갑과 드라이버정도만 준비해도 충분하다고 본다.
Other materials for desktop building are gloves, cross/screw driver, and cable ties. Since nowadays product
contains small screws, cables, such as SATA cables, and cable ties, I think it’s enough to prepare gloves and drivers.
CPU 조립
본격적인 조립의 첫 단계는 CPU를 마더보드(메인보드)에 연결하는 것이다. 요즘은 마더보드 제조사들이 Intel, AMD CPU에 맞게
특정 라인의 제품들을 생산하고 있으니 호환성을 확인한 후 구매하면 된다. 이번에 사용한 AMD 3700X는 MSI의 B450 라인과 호환이 된다.
The first step of the assembly is to connect the CPU to the Motherboard (Mainboard). In these days, motherboard
manufactureres produce specific lines of products for Inter and AMD CPUs, respectively, so you can choose the appropriate board for your CPU.
The AMD 3700X used this time is compativle with MSI B450 line.
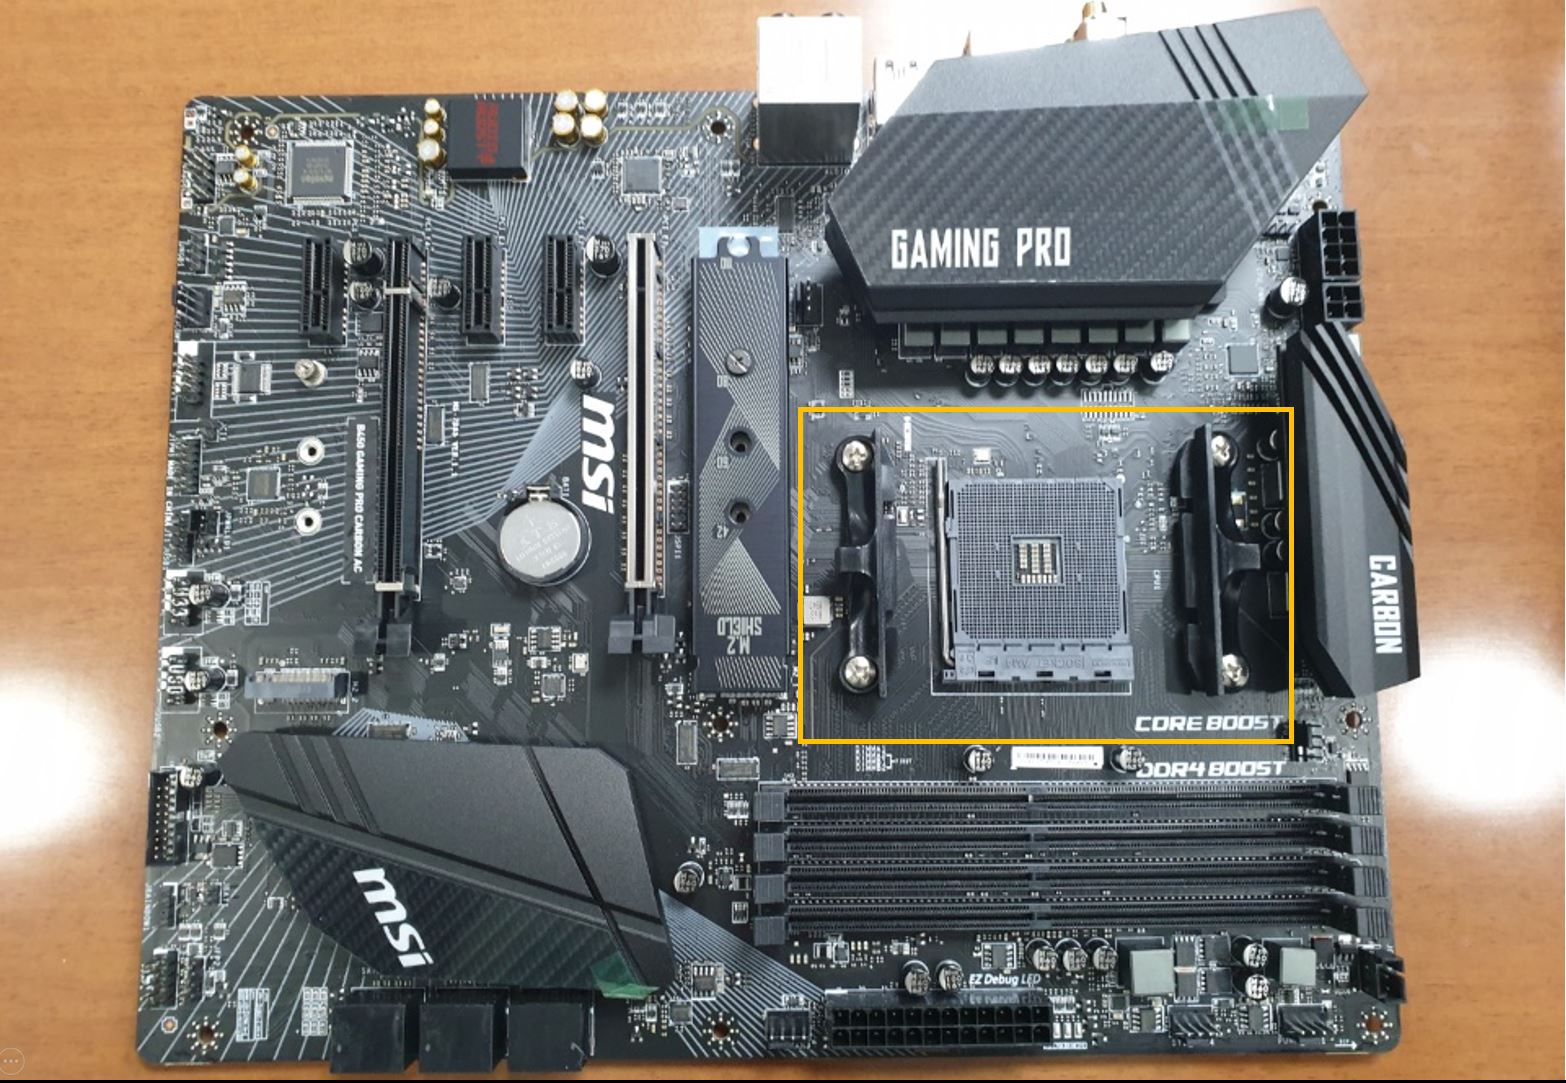
위의 그림에서 노란 박스로 표시한 부분이 MSI B450 Gaming pro 보드에서 CPU를 조립하는 부분이다. 이 보드는 자체적으로
CPU 쿨러 지지대가 내장되어있지만, 별도의 쿨러를 구매하는 경우 박스안에 보이는 지지대를 제거하고 새 지지대를 붙이면 된다. 하지만 이번에는 R7 3700X에서
자체적으로 제공하는 쿨러를 사용했기때문에 지지대를 따로 제거하지는 않았다. (사실 농협쿨러라는 이름으로 유명한 NH-D15 쿨러가 있긴했지만.. 따로 도전하지는 않았다.)
The yellow box area in the above figure shows the CPU assembly part on the MSI B450 Gaming Pro board.
The board has its own CPU cooler support, but if you buy a special cooler you can simply remove the basic supprot and attach a new one.
But this time, I didn’t remove the supprot, because I used the basic cooler that included in the Ryzen 7 3700X package.
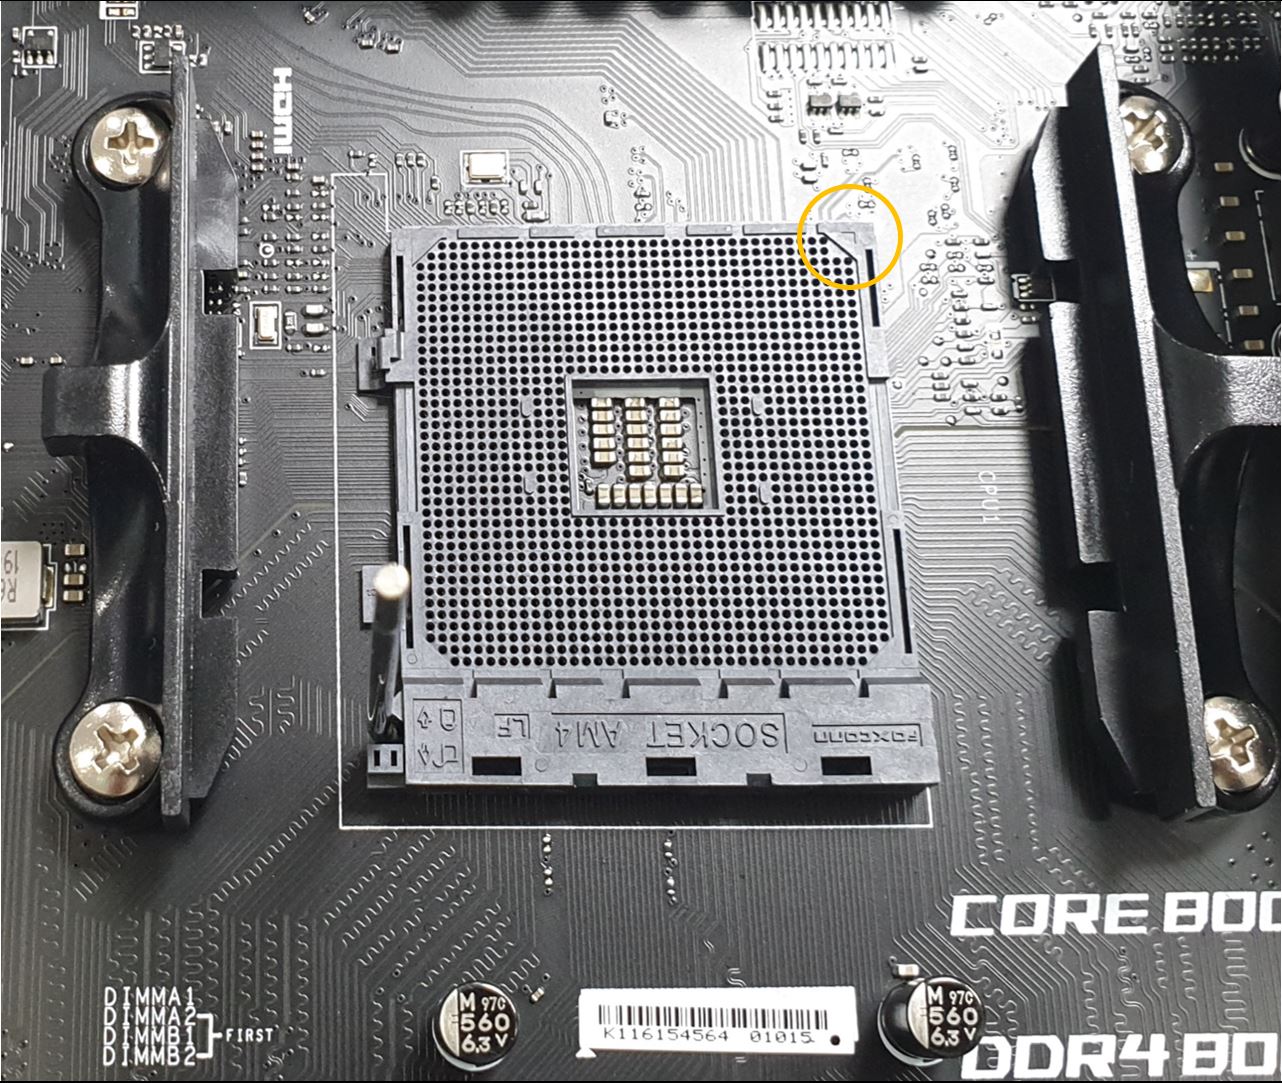
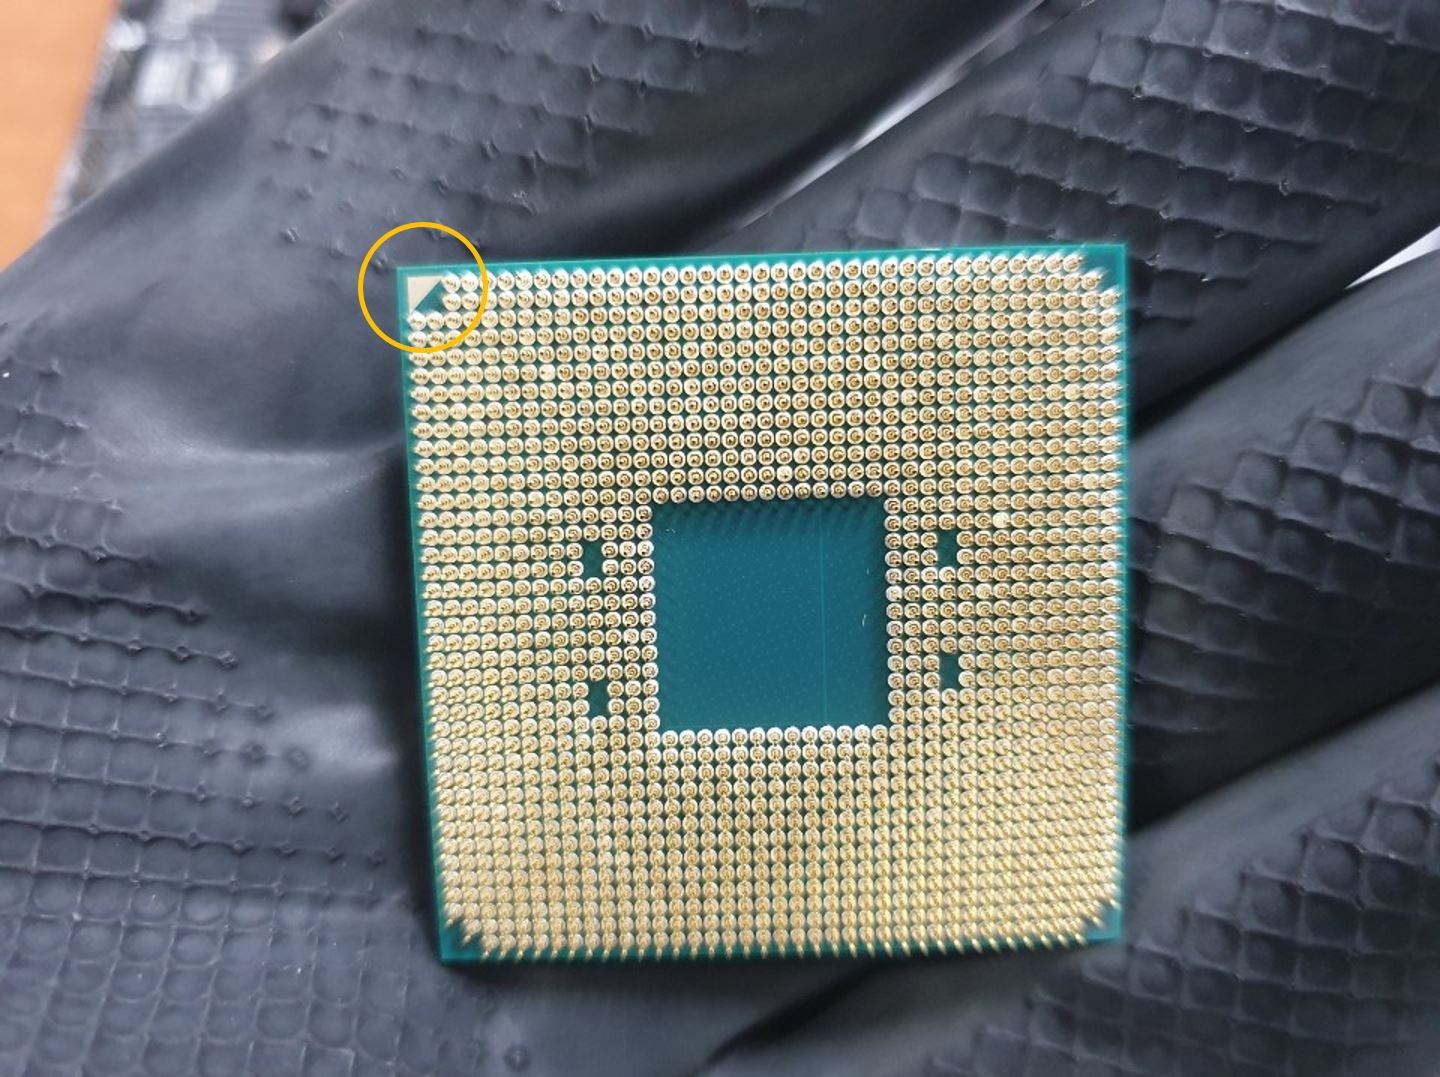
사실 CPU 조립은 굉장히 쉬운데, 위에 보이는 두 개의 세모 모양에 맞춰서 CPU를 메인보드 홈에 올려주면 끝나기 때문이다.
CPU 칩의 세모 모양이 있는 방향과 메인보드의 세모 모양이 있는 방향을 맞게 올려놓으면 딱 맞는다는 느낌과 함께 CPU 칩이 들어간다.
여기서 힘을 주면 CPU 칩이 손상될 수 있으니, 단순히 올려놓는다는 느낌으로 조립하면 된다.
In fact, CPU assembly is very easy because it is done by putting the CPU on the board with fitting the triangle marks.
If you place the chip with the correct direction, The CPU chip will fit perfectly. Applying force can damage the chip, so simply assemble it as if
you’re placing the chip on the board.
Comments